ShipStation Custom Store Docs
The ShipStation Custom Store is a lightweight integration application that synchronizes orders between Commerce7 and ShipStation fulfillment platform. Built in GO for speed and performance, it handles real-time order syncing, tracking integration, and advanced order management features.
Introduction
Welcome to the ShipStation Custom Store documentation. This guide will walk you through setting up the integration between Commerce7 and ShipStation.
The ShipStation Custom Store is a lightweight integration application that synchronizes orders between Commerce7 and ShipStation fulfillment platform. Built in GO for speed and performance, it handles real-time order syncing, tracking integration, and advanced order management features.
Features
- * requires ShipStation API setup
Requirements
Before you begin, make sure you have:
- A ShipStation account
- Commerce7 admin access
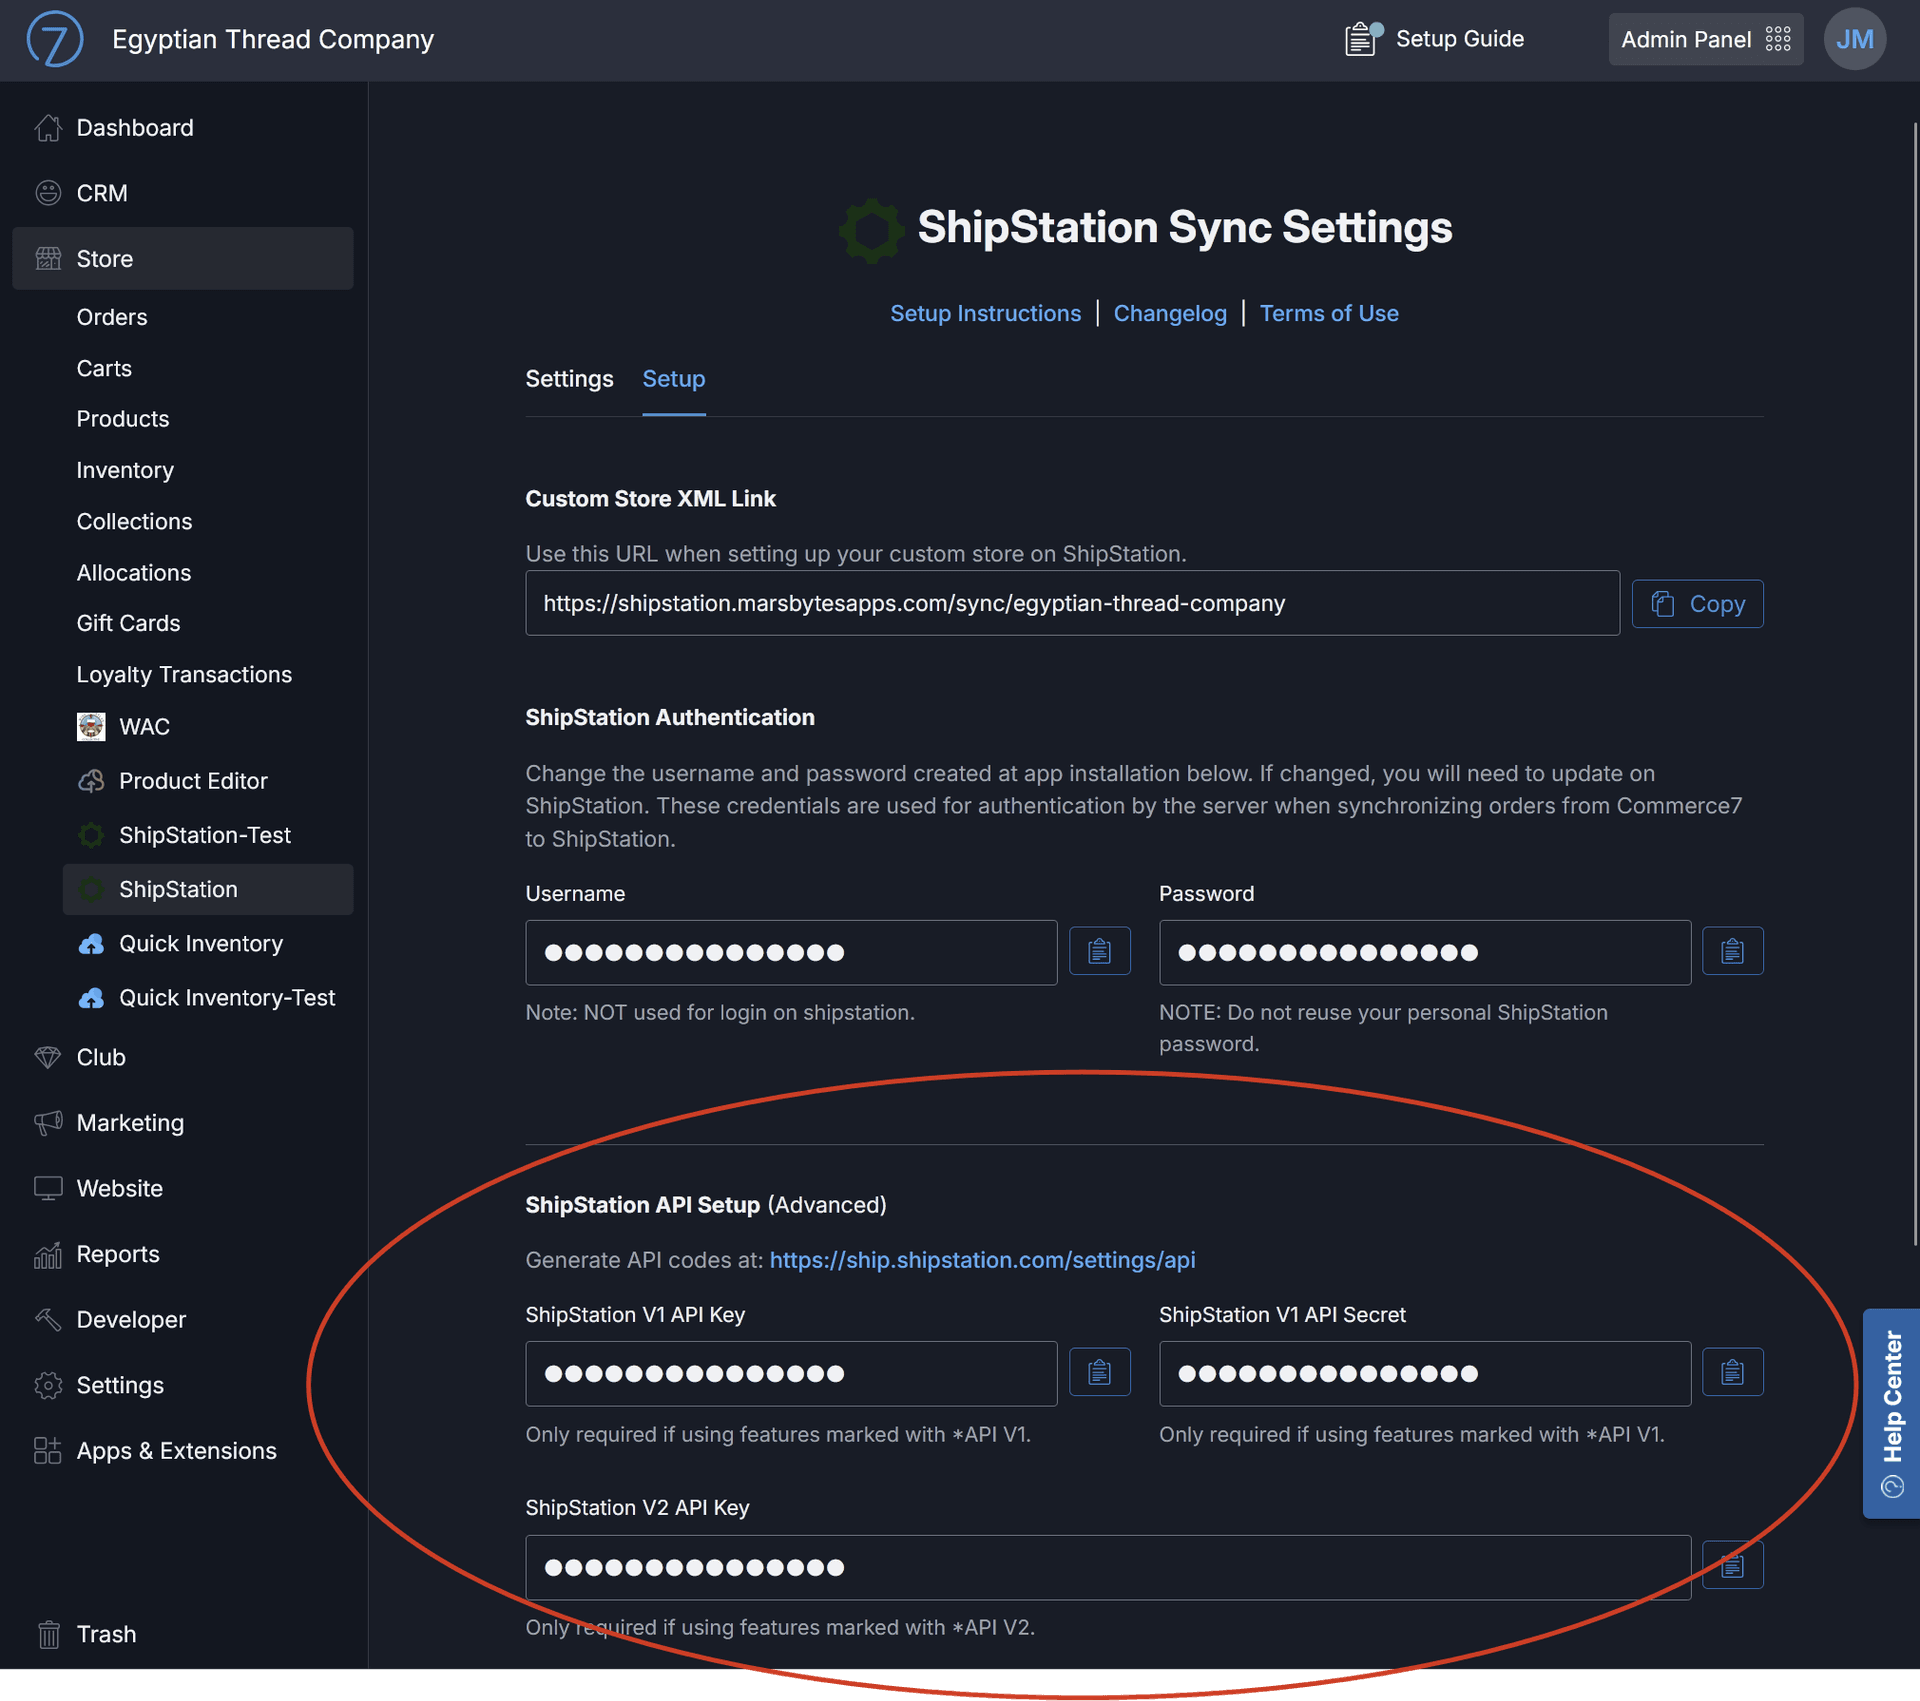
- (Optional) ShipStation API Keys - V1 and V2Generate API codes here →
Setup Instructions
Step 1: Install the App
Sign up for a ShipStation account (if you don't have one already) and install the "ShipStation Custom Store" app by MarsBytes from the Commerce7 App Store.
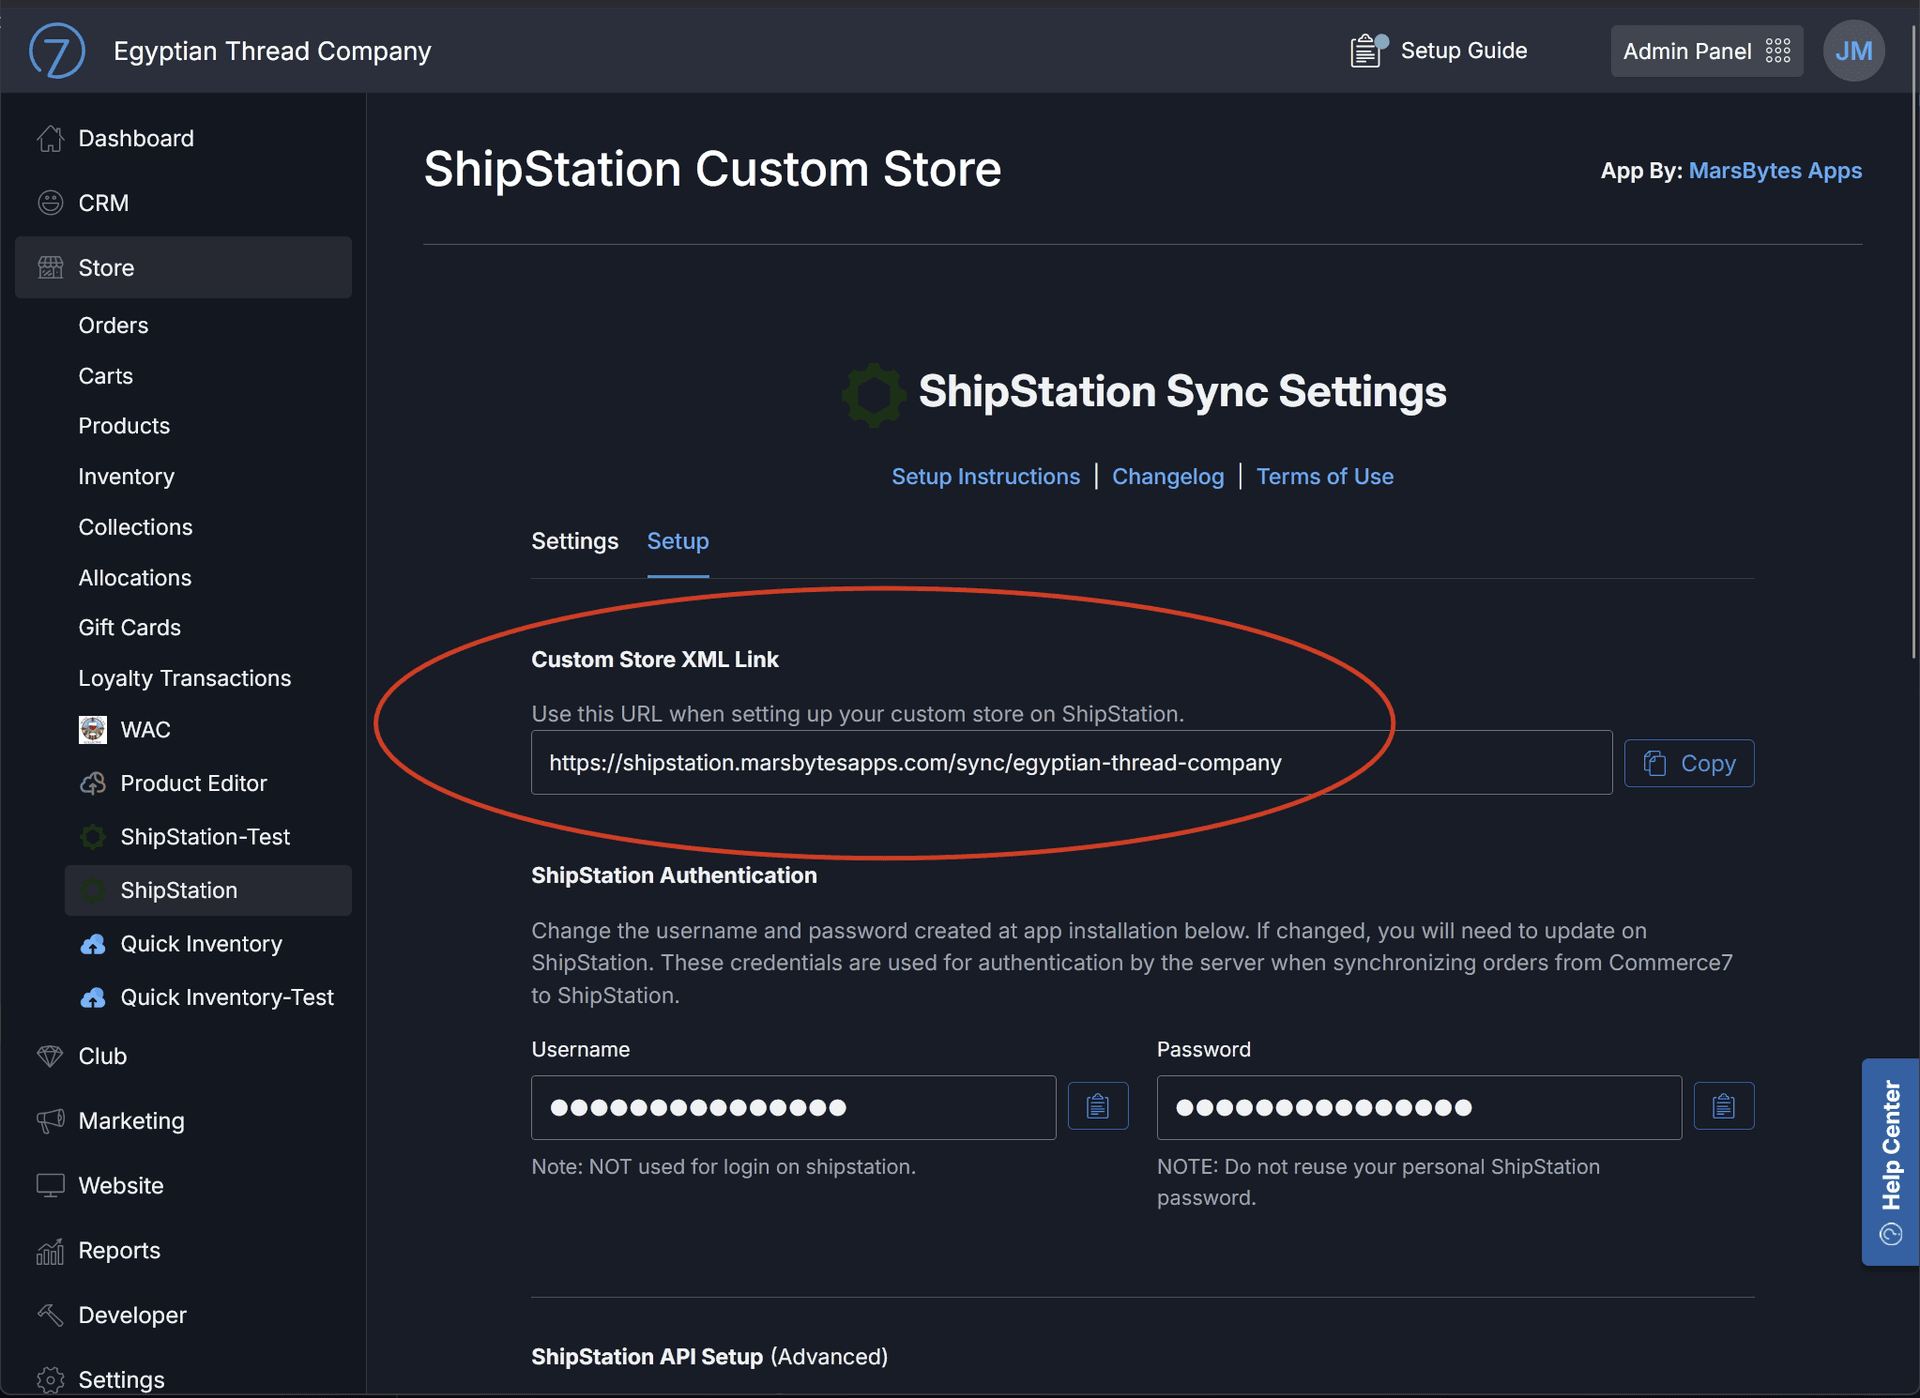
Step 2: Get Your Custom XML Link
After installing the app, open it in your Commerce7 Admin Panel. You'll find the Custom XML Link in the app's settings page. Copy this link - you'll need it for ShipStation.
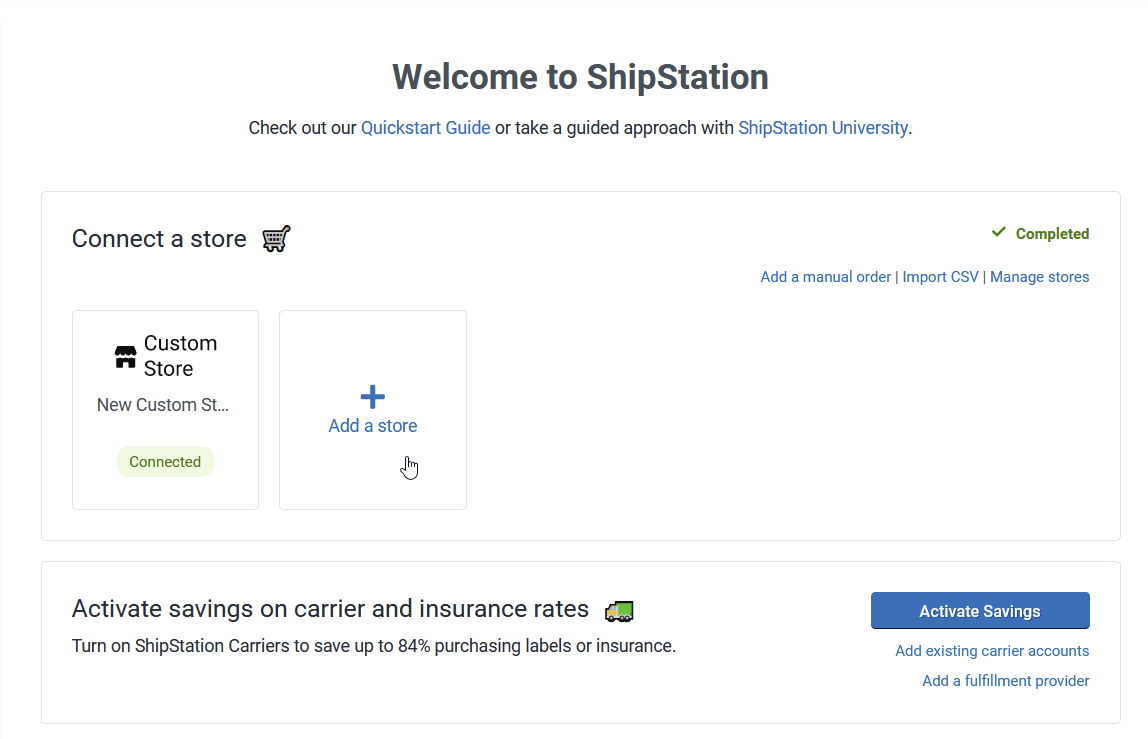
Step 3: Add Custom Store in ShipStation
Log into your ShipStation account and add a new store.
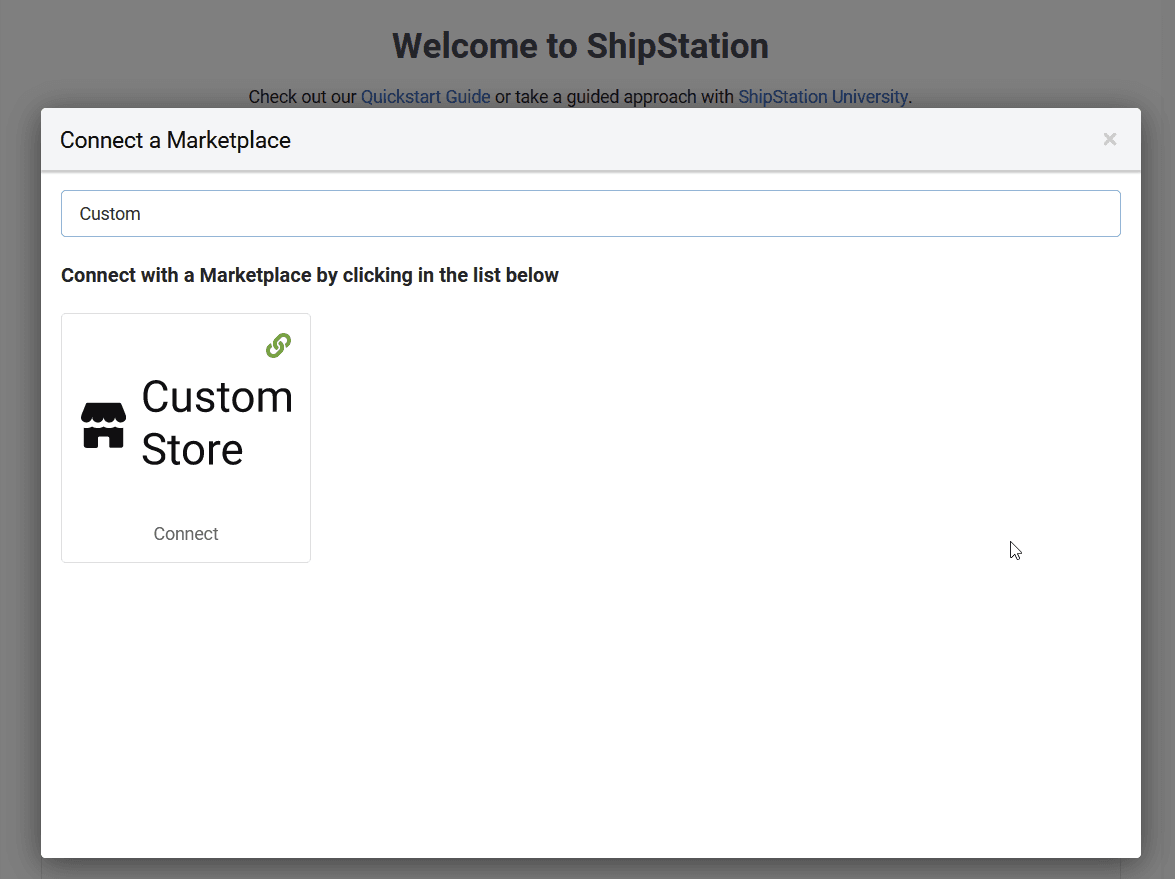
Step 4: Search for "Custom Store"
In the store selection screen, search for "Custom Store" and select it.
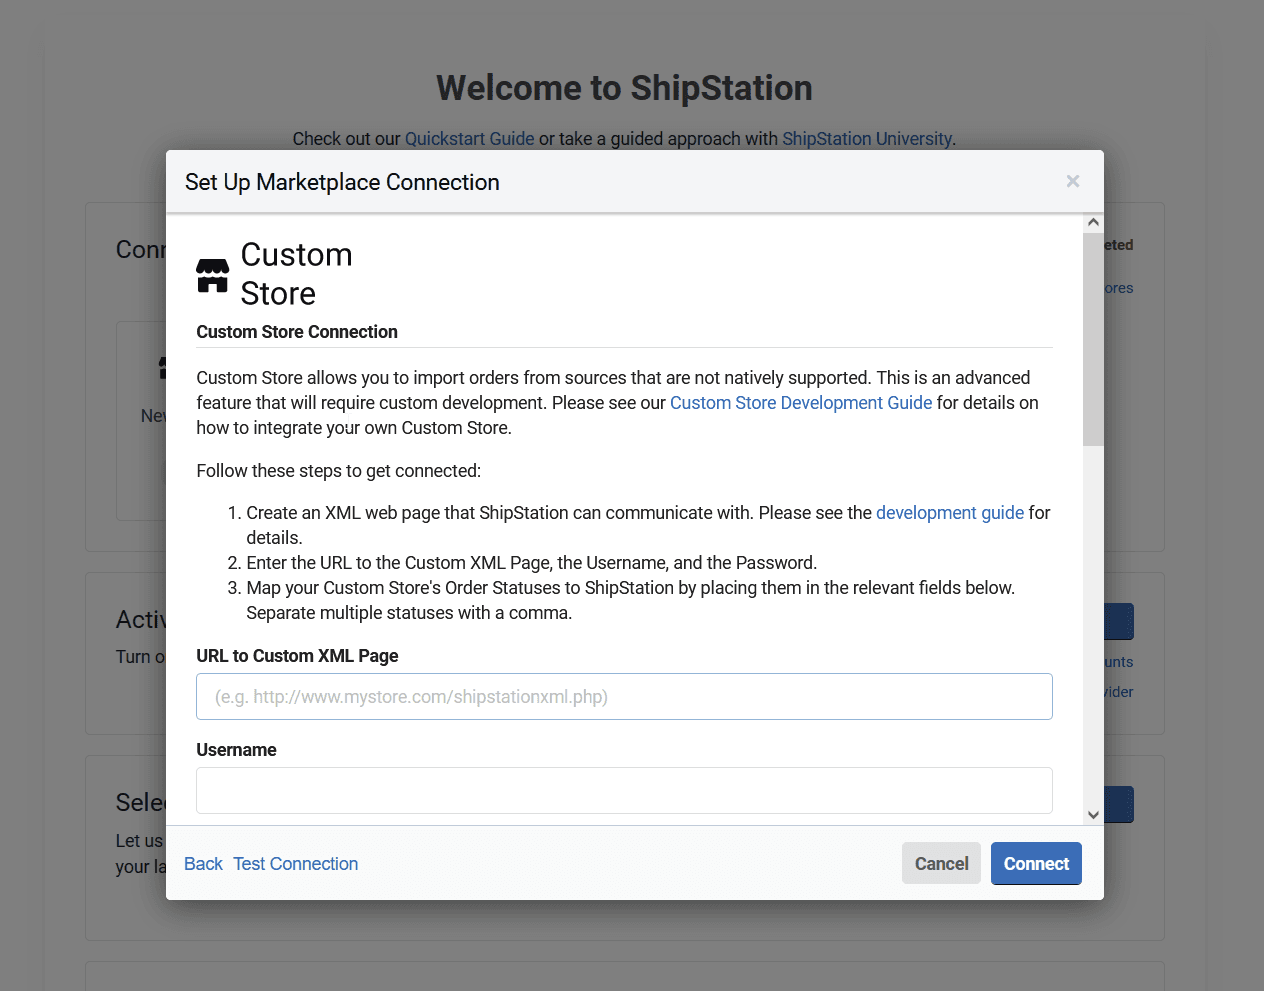
Step 5: Enter Connection Details
Enter the Custom XML Link, username, and password from Step 2. Then click "Test Connection" to verify everything is set up correctly. Once confirmed, click "Connect."
Step 6: Add API Keys (Optional but Recommended)
Required for advanced features like checking order status from Commerce7 and auto-canceling refunded orders, add your ShipStation API Keys (both V1 and V2) in the app's settings page.
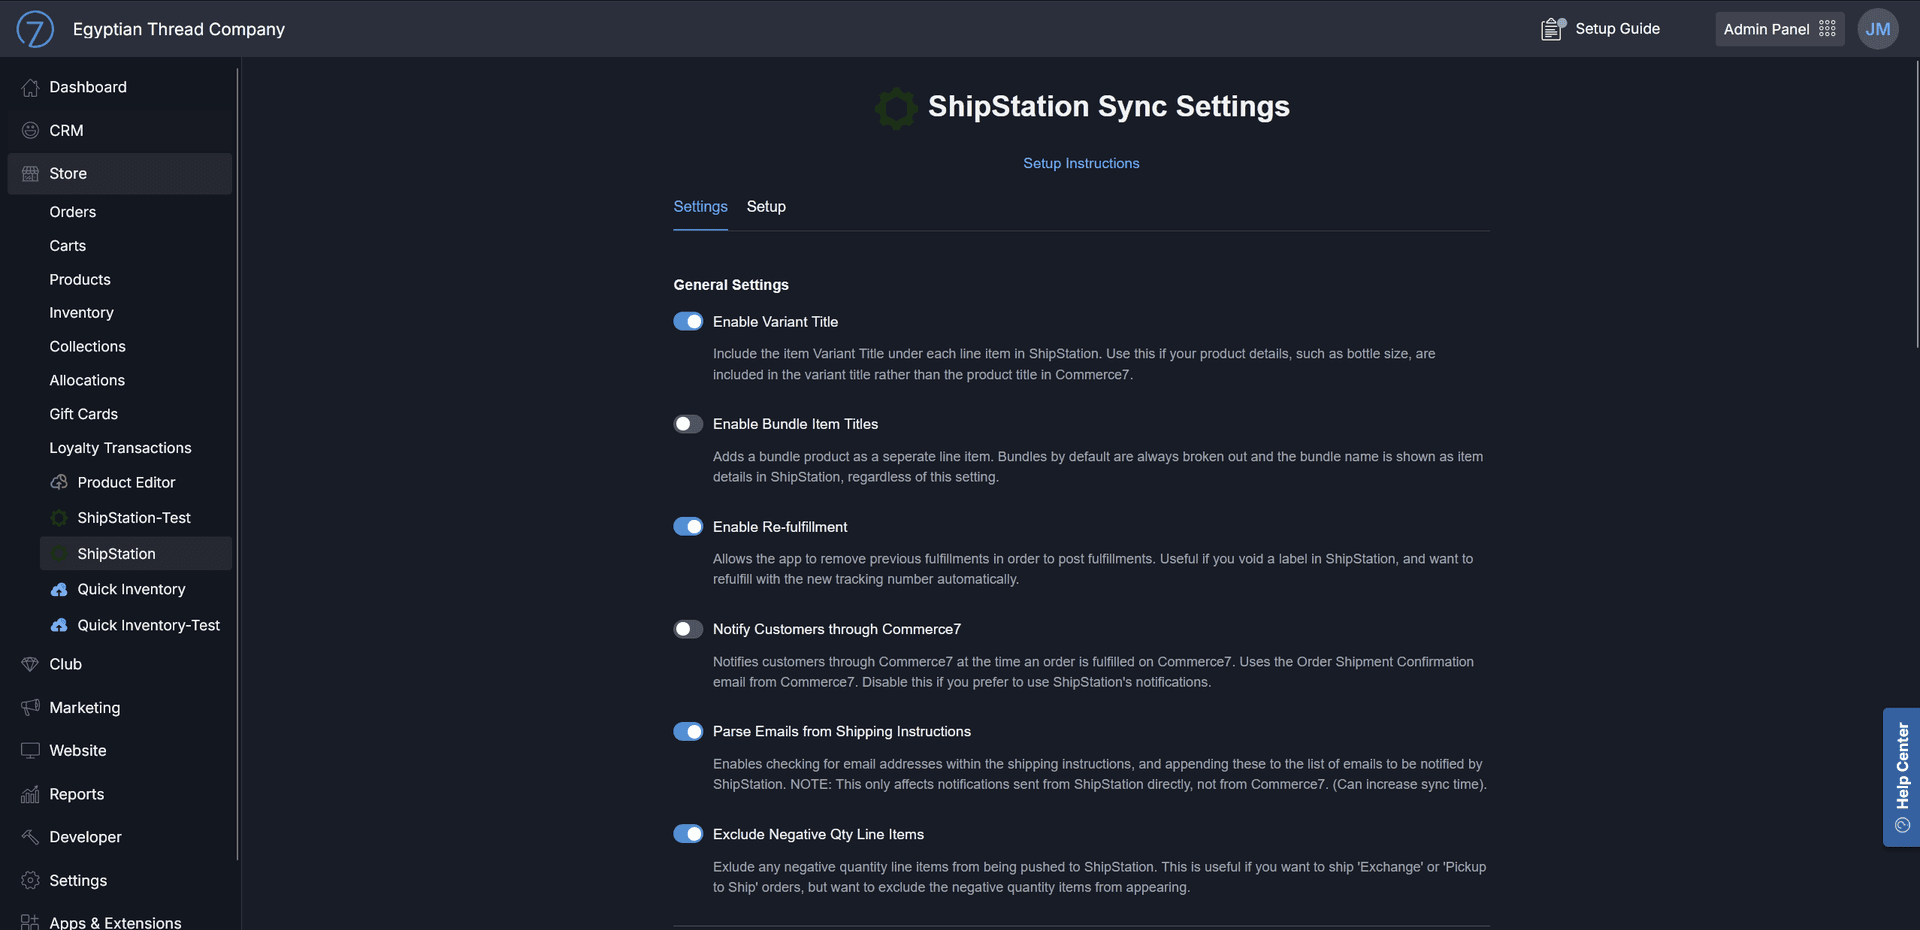
Step 7: Customize Your Settings
Adjust the app settings to match your workflow. You can customize field mappings and other options directly in the Commerce7 admin panel.
Step 8: Start Syncing!
That's it! Your orders will now automatically sync from Commerce7 to ShipStation periodically.
Note: To manually trigger a sync at any time, press the sync button in the top right in ShipStation.
Need Help?
If you run into any issues, contact us at support@marsbytesapps.com
Please include: your winery name, screenshots of any errors, and steps to reproduce the issue.